A poke at fighting games with game theory
I love fighting games. They are the best video games for anyone to just start watching and enjoy the show. The rules are easy to pick up - 2 characters (or teams of characters) enter and start beating each other up until the other’s life bar (or bars) depletes 1. The games are quick (usually only a few minutes), fast-paced, and the aesthetics are designed to highlight the significant moments so viewers don’t miss a beat. Recent fighting games have added features mainly for the spectator experience, such as freeze frames, flashy cinematic animations, and slow motion to further increase the hype and tension for players and spectators.
This is Evo moment #37. Two fighting game all-time legends Daigo Umehara and Justin Wong are facing each other on the biggest stage for fighting games - Evolution (or Evo for short). Daigo is in danger of losing to any hit from Justin. Justin unleashes a super move that does a dozen attacks, each of which would kill Daigo if Daigo just simply stands there and guards them. Daigo successfully inputs the parry with precision timing for each individual hit of Justin’s super move, and then does a full combo back to complete the unlikely comeback. All of this in front of a crowd that slowly realizes the significance of the events on the screen and ends with a crescendo of utter madness and disbelief. This is probably the most referenced and analyzed clip of all time from any fighting game, if not any video game. Even if you have no idea what’s going on, the energy from the crowd gives you the feeling that something amazing is going on and it’s hard to not get caught up in the excitement.
Evo moment #37 is from 2004, and fighting games have only moved onto larger stages and production value. Here’s a favorite moment of mine that’s from Evolution 2018. Here, American player Terrelle “Lil Majin” Jackson takes on Korean Kim “JDCR” Hyunjin in the Mandalay Bay Event Center in Las Vegas. While Lil Majin is a good player in his own right, JDCR is one of the greatest players in the whole world, making the only American player left in the tournament a clear underdog. This gap was only made more clear when Lil Majin gets crushed in the first game in the best of 3 series. With the home crowd roaring behind his back, legendary commentary that’s pushing the story of the underdog American, and theatrics from pro wrestling lover Lil Majin, the set ends up being a nail-biter where the tension and excitement never lets up. (The video is skipped to just before the 2nd game starts).
Even though I don’t really play competitively, I still look forward to the big tournaments every year. Competitive fighting games are so exciting to watch as a casual observer, but there’s also a lot of depth to fighting games than is evident from just what’s visually on the screen. For the Evo moment #37 clip, a person fluent in video games in general may read that Daigo just made a unlikely comeback after deflecting a barrage of attacks from the attacker, and that it was probably pretty hard to do. A player really familiar with the game realizes that the Daigo had to:
- make over a dozen precisely timed button presses (each within a window of about 7 milliseconds)
- have the awareness and mental fortitude to go for the additional risk of jumping and parrying the final hit to land a max damage combo to ensure the comeback
- start off the entire thing predicting when the attacker was going to even start since it’s too late to react to once the attack animation starts
The clip has been analyzed several times from several perspectives, you just have to search for “Evo moment #37” to find more insight on it. But here’s a link to the wikipedia page to start you off. That’s right, this one minute moment from an old video game tournament is notable enough to have its own Wikipedia page!.
The amount of sub-second decisions, situation recognition over matchups over dozens of characters, and the amount of mental fortitude to execute what you need to do under pressure is what makes fighting games so rewarding to players willing to dedicate some time to getting good at something. I don’t have the experience of being a good fighting game player, but that doesn’t mean I can’t appreciate the depth that’s in fighting games! What I do have instead is a hobbyist interest in game theory and math and applying them to toy situations.
Here I want to highlight a little of the depth of fighting games by diving into just one tiny situation in a fighting game using a little bit of game theory. Hopefully, it would entice you to be at least somewhat interested in fighting games (if the above clips weren’t enough to pique your interest), or just the use of game theory and mathematics in general.
Introducing Josie and her switch stance
Recently, I’ve been playing the fighting game “Tekken 7”. Tekken has a pretty diverse selection of origin countries for their cast, even going so far as getting voice actors to voice the character in what their native language would be. Being from the Philippines, I got into playing a character named Josie. Continuing the long tradition of stereotypes in fighting games, Josie is the perfect representation of a filipina woman. Her costume is as if someone took the Philippine flag and made a skirt out of it. Her name is the equivalent of naming your American daughter after George Washington. She even cries when she wins, which if you ever watch any filipino television, you’re aware of a filipino’s eagerness to give you a sob story if you hand her screen time. The only thing missing is that her voice actress doesn’t talk in Taglish.
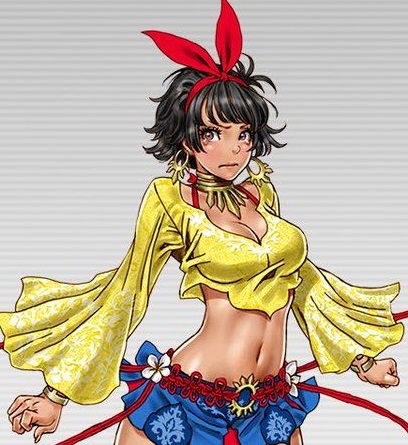
This is Josie. She’s totally not crying because she wants head pats from you. (Source)
In game, I would describe Josie’s play style as being a nuisance to the opponent. She can get her opponents to be in situations where they are disincentivized from attacking by threatening to do big damage if the opponent attacks at the wrong time or distance because of a wrong guess or just matchup unfamiliarity. The usual result is that the opponent learns to “not press buttons” (the first tip I would give to anyone learning to play against Josie!). But if the opponent respects her too much, Josie can chip away at her opponent slowly to death.
For people learning how to play either as or against Josie, one of the first situations they encounter is her “switch stance”. After certain attacks, she pulls an Inigo Montoya (or a Ryoma Echizen if you prefer anime references) and leaves her right foot forward and then suddenly she obtains access to all new powerful moves. However, she can only stay in the stance for a short while because it would simply be unfair for her opponent if she was so powerful all the time.
The switch stance transition. Josie knows something you don’t know. She’s not left-footed.
Before explaining what her moves from switch stance are, I’ll first go over some Tekken notation and concepts to save myself some typing later. Tekken is a 4 attack button game on top of basic up/down/left/right movement. Each of the 4 attack buttons roughly map to a limb of the body.
- 1 - Left Hand
- 2 - Right Hand
- 3 - Left Foot
- 4 - Right Foot
So if I write switch 1, this is the attack that comes out when I press the 1 button while in switch stance. This attack turns out to be a left elbow. Sometimes an attack involves pressing multiple buttons which is denoted with “+”. so 1 + 2 means pressing the 1 and 2 buttons at the same time, and usually has to do with the hands or upper body.
Attacking moves are generally classified as high, mid, and low. A defender can either guard standing or ducking. A standing defender will block high and mid attacks and take no damage, but will get hit by low attacks. A ducking defender will evade high attacks and block low attacks and take no damage, but will get hit by mid attacks.
Let’s now go back to looking at Josie’s switch stance. When Josie is in switch stance, all 4 buttons lead to moves that pretty good. After Josie goes into switch stance, she has such a head start over her opponent that all of her moves will usually hit before an opponent’s move connects if the opponent tries to attack back. This is known as a “counter hit”. Josie’s switch 1, 2, and 3 (a high, mid, and low attack respectively) all stun her opponents on a counter hit, leading to a massively damaging combo. Switch 2 and 3 will generally beat any move from the defender except a jab, which is typically the fastest move available to a character. Switch 1 is fast enough to even beat a jab for the counter hit combo. Switch 4 is another mid option that doesn’t give a counter hit combo, but does more slightly damage than a switch 2 in the case the opponent is just ducking.
To summarize:
- Switch 1 is a high attack that can counter hit combo any move, including jabs.
- Switch 2 is a mid attack that can counter hit combo any slow move
- Switch 3 is a low attack that can counter hit combo any slow move
- Switch 4 is a mid attack that has no counter hit combo, but does more damage than switch 2 on a ducking defender.
Switch 1 counter hit combo on defender that did jab or slow move. (Switch 2 and 3 have similar combos on a defender that did a slow move)
Switch 2 on ducking defender
Switch 2 interrupted by jabbing defender. Switch 3 and 4 are similarly interrupted by jabs.
Switch 3 on standing defender
Switch 4 on ducking defender
Low attacks in Tekken 7 are generally slow enough such that a defending ducking player can, after blocking, retaliate with their own attack before the attacker can recover to block. This is known as a “block punish”. Using Josie as a reference for the defender, a defending Josie can block punish with a kick for moderate damage.
Switch 3 on ducking defender, block punished
A first look at the switch stance mixup game using game theory
We can lay out the options both players have and the resulting damage (rounded to the nearest multiple of 5 damage) in a table 2. The rows are the attacker’s options and the columns are the defender’s options. Positive numbers are damage given by the original attacker, and negative numbers are damage given by the defender (like if the defender landed an attack in retaliation). This table is called a “strategic form” or “normal form” of a game.
| Stand | Duck | Jab | Slow move | |
|---|---|---|---|---|
| Switch 1 | 0 | 0 | 70 | 70 |
| Switch 2 | 0 | 15 | -5 | 70 |
| Switch 3 | 15 | -15 | -5 | 70 |
| Switch 4 | 0 | 20 | -5 | 20 |
If you reason about this table long enough, you may realize that the defending player has no reason to ever try a slow move. A jab will result in better results most of the time and gives no worse results even in the case of a switch 1 from the attacker. If we assume that the defending player will not then choose to do a slow move, then the attacking player will never choose to do a switch 2 because switch 4 will give no worse and sometimes better results over all the remaining defending player’s options.
However, even we remove these worse options from consideration, it’s not obvious what either player should do. The best option depends on what the other player chooses. For example, if the defending player chooses to just stand and guard, the attacker will want to do the low attack. However, If the attacking player does a low attack, the defending player then wants to duck guard. But if the defending player ducks, then the attacker would want to do a mid attack instead. If the attacker wants to do a mid attack, the defender would want to stand guard and we’re back where we started. This is essentially a game of rock, paper, scissors and the resulting guessing game is known in fighting games as a “mixup”. So I’ll call this game the switch stance mixup game.
If you’ve ever played games of rock, paper, scissors, you would know that the best strategy is to just randomize evenly as best you can 3. But here the probabilities to choose which option isn’t that obvious because the payoffs are different for each result. For example, if the defending player chooses among the 3 options of stand, duck, jab with even 0.33 probability, and then consider how much damage the attacker would get for each option, we get:
| Defender strategy probabilities | 0.33 | 0.33 | 0.33 | 0 | |
|---|---|---|---|---|---|
| Stand | Duck | Jab | Slow move | Expected damage (given defender strategy) | |
| Switch 1 | 0 | 0 | 70 | 70 | 23.33 |
| Switch 2 | 0 | 15 | -5 | 70 | 3.33 |
| Switch 3 | 15 | -15 | -5 | 70 | 13.33 |
| Switch 4 | 0 | 20 | -5 | 20 | 5 |
If the defender commits to these even probabilities, the attacker would just prefer to use switch 1 all the time because that does the most expected damage out of all options given the defender’s strategy. Then the defender would then want to change their strategy in response, and so on, so forth. A reasonable line of questioning to ask is - “ok, does this changing of responses ever stop? Is there a time where the 2 players stop wanting to change their strategy?” My intuition is that this would be the strategies that players with repeated play experience would tend towards 4.
A pair of strategies where the 2 players do not want to change their own strategy given the other player’s strategy is called a Nash equilibrium. Nash equilibria are well-studied concepts in game theory that come in many different forms. Here we’re going to look for mixed Nash equilibria because the players are randomizing among their options. We can try to calculate the Nash equilibria of this game by hand (See Appendix A), but I’m going to use a handy Nash equilibria solver here 5. If you use the web solver yourself, and I do encourage you to, I’m setting the payoff matrix as the damage numbers for the attacker and checking the box that this is a zero-sum game.
There turns out to be one Nash equilibrium in this mixup game.
| Defender strategy probabilities | 0.648 | 0.278 | 0.074 | 0 | ||
|---|---|---|---|---|---|---|
| Attacker strategy probabilities | Stand | Duck | Jab | Slow move | Expected damage (given defender strategy) | |
| 0.136 | Switch 1 | 0 | 0 | 70 | 70 | 5.189 |
| 0 | Switch 2 | 0 | 15 | -5 | 70 | 3.796 |
| 0.346 | Switch 3 | 15 | -15 | -5 | 70 | 5.189 |
| 0.519 | Switch 4 | 0 | 20 | -5 | 20 | 5.189 |
| Expected damage (given attacker strategy) | 5.189 | 5.189 | 5.189 | 44.07 |
The expected damage for each option with assigned non-zero probability for either the attacker or defender are the same (5.189). The 2 strategies that have 0 probability assigned have “worse” expected damage for the respective players: Switch 2 has less expected damage than the other attacker options, and a slow move has more expected damage (for the attacker) than any defender option. So this is indeed a Nash equilibria as neither player can change their strategy to get a better result.
In this equilibrium, the defending player just stands there most of the time, ducking about a third of the time to catch the switch 3, and occasionally uses the jab to stop the switch 3 or 4. The attacking player mostly takes the safe option of doing the mid attack switch 4 hoping the defender is ducking, doing the low attack switch 3 to try to incentivize ducking in the first place, and doing the switch 1 occasionally to disincentivize the defender from jabbing.
From actual play, this is indeed what happens when I play with real people that are new to the Josie matchup. That is, at least after they figure out they should stop trying to attack me in switch stance haphazardly after a few counter hit combos. But from the outside observer, I’m sure it looks pretty silly that I’m just futilely doing an attack into their guard for no damage most of the time.
The switch stance mixup game against a better defender
More advanced players will know that the options from switch stance aren’t quite so safe as I’ve laid them out here.
- The defender can duck while using the universal low parry on a switch 3 to knock the attacker on the ground and do a moderately damaging combo to the attacker.
- The defender can also duck switch 1 and then launch the attacker into the air for a big combo.
- The defender can convert a jab interrupt on a switch 4 into a float combo for more damage.
Switch 1 on ducking defender, then launch punished. If I ever see this happen to me, I know I’m in trouble.
Switch 3 on ducking defender that does a low parry combo
Switch 4 on defender that jabs and follows up with a float combo. If I see this, I *really* know I’m in trouble. (Note: I don’t really know float combos. It’s possible that Josie herself can get even more than this.)
Changing these damage numbers in the payoff table and using the solver to recalculate the Nash equilibrium, we get:
| Defender strategy probabilities | 0.677 | 0.156 | 0.167 | 0 | ||
|---|---|---|---|---|---|---|
| Attacker strategy probabilities | Stand | Duck | Jab | Slow move | Expected damage (given defender strategy) | |
| 0.087 | Switch 1 | 0 | -65 | 70 | 70 | 1.510 |
| 0.813 | Switch 2 | 0 | 15 | -5 | 70 | 1.510 |
| 0.101 | Switch 3 | 15 | -50 | -5 | 70 | 1.510 |
| 0 | Switch 4 | 0 | 20 | -40 | 20 | -3.54 |
| Expected damage (given attacker strategy) | 1.510 | 1.510 | 1.510 | 70 |
Now the risk of switch 4 getting jab floated into a combo doesn’t justify the additional damage over switch 2, so the attacker completely switches to using switch 2 instead of switch 4 as the mid move of choice. The attacker also does switch 1 and switch 3 much less often since the defender can punish the attacker with much more return damage. The overall result is still very similar. If anything, the attacker is just futilely doing mid attacks into a standing guard for no damage even more often than before since the attacker is doing the mid option 80% of the time. The threat of the defender getting better ducking payoffs manifests itself in the defender ending up ducking less often than before because the attacker doesn’t want to make give as many opportunities for the defender to get the better payoffs in the first place. It makes intuitive sense, but I first found this intriguingly paradoxical.
This matches up with my personal experience. If I see that the defender is prepared to duck and combo me for doing switch 1 or 3, I start reducing my use of switch 1 and 3 and just do mid options to reduce my risk even if I’m just hitting his guard most of the time.
The overall expected damage per mixup game has also gone down from 5.189 to 1.510 damage for the attacker. This kind of sucks for me as the attacking Josie since then I’m really not getting that much payoff for getting into the switch mixup game in the first place. I might be better served by initiating a different mixup game or playing a different kind of play style altogether. I might even need to (gasp) get good at the game.
Adding step in transitions as another layer of depth
But the situation is not dire for a switch stance loving Josie, she actually has more options out of switch stance by pressing forward while in stance. This transitions Josie into another stance called “step in” (or “crouch dash” in common Tekken speak to group it with other similar dashing moves from other characters) where she doesn’t do a move but just dashes into the opponent. While she’s dashing in, she ducks under defending jabs and she has access to other moves 6:
- step in 3 - a low attack that does more damage than switch 3.
- step in 2 - a mid attack that launches the defender high into the air for big damage. With proper timing, this can go under a jab and launch the defender before the defender can recover.
- step in 1 + 2 - a mid attack for some damage, but not as much as a step in 2.
Step in 3 on defender that ends up standing. This is probably Josie’s most obnoxious move because it just leaves you standing there feeling silly that you didn’t duck.
Step in 2 on defender that ends up ducking. With proper timing, this can also catch a defender that jabbed before they can recover. This is why you shouldn’t just duck Josie.
Step in 1+2 on defender that ends up ducking. This does less damage as a mid option from step in, but it comes with less risk.
However, more reward often comes with more risk. A defending josie can low block a step in 3 and block punish it with a full combo. A step in 2 that’s guarded standing can be block punished by a moderately damaging combo. However, the step in 1+2 is completely safe and cannot be block punished.
On top of all that, a step in transition is slow enough such that the defender can actually sneak in a slower move that would have been beaten before by any option from switch stance. There’s enough time that the defender can do a launching move to do a full combo back onto the attacker, so I’ll just consider the defender only possibly doing a launching move as the slower move of choice.
Step in 3 on defender that ends up ducking and block punishes. This combo actually takes some practice to do, so if I see a defending Josie do this, I know they mean business.
Step in 2 on defender that ends up standing and block punishes.
The defender doing a launch on the attacker doing a step in transition.
A further complication is that a defender that didn’t initially commit to doing a launch has enough time to choose to transition into a stand or duck guard for the step in move. So the defender sort of has a 2 turns of defending. They can either stand, duck, jab, or launch initially. If the defender doesn’t commit to a launch and the attacker ended up doing a step in move the defender can then choose whether to stand or duck. We effectively have 7 different strategies for the defender. We’re really adding on the layers of depth now!
Adding in these additional options for the attacker and defender and recalculating the Nash equilibrium gives:
| Defender strategy probabilities | 0.568 | 0.091 | 0.152 | 0 | 0.162 | 0 | 0.026 | ||
|---|---|---|---|---|---|---|---|---|---|
| Attacker strategy probabilities | Stand / Stand | Stand / Duck | Duck / Duck | Duck / Stand | Jab / Stand | Jab / Duck | Launch | Expected damage (given defender strategy) | |
| 0.043 | Switch 1 | 0 | 0 | -65 | -65 | 70 | 70 | 70 | 3.301 |
| 0.396 | Switch 2 | 0 | 0 | 15 | 15 | -5 | -5 | 70 | 3.301 |
| 0.049 | Switch 3 | 15 | 15 | -50 | -50 | -5 | -5 | 70 | 3.301 |
| 0 | Switch 4 | 0 | 0 | 20 | 20 | -40 | -40 | 20 | -2.926 |
| 0 | Step in 2 | -50 | 70 | 70 | -50 | 70 | 70 | -60 | -1.568 |
| 0.103 | Step in 3 | 25 | -55 | -55 | 25 | 25 | -55 | -60 | 3.301 |
| 0.410 | Step in 1+2 | 0 | 20 | 20 | 0 | 0 | 20 | -60 | 3.301 |
| Expected damage (given attacker strategy) | 3.301 | 3.301 | 3.301 | 3.301 | 3.301 | 3.301 | 3.301 |
The solver actually gives 5 different (extreme) Nash equilibrium! I only give one of them as an example here. This means that there’s actually an infinite number of Nash equilibria that are mixtures of those 5 Nash equilibria the solver gave. This isn’t really a surprise given the almost turn-based nature of the defender’s game. Many of the payoffs look the same across defender options so it’s easy to transition probabilities from one strategy to the other without changing the expected payoffs.
If we decompose the probabilities for the defender back into the 2 different decision stages, we get these probabilities (this is the same for all of the Nash equilibrium).
Initial defender decision:
| 0.659 | 0.152 | 0.162 | 0.026 |
| Stand | Duck | Jab | Launch |
Secondary defender decision in case of attacker step in. Note this doesn’t add up to 1 due to the launch initial option taking away a decision here.
| 0.730 | 0.243 |
| Stand | Duck |
This is a satisfying result from a gameplay perspective because the attacker still finds use of most options, even if it’s just occasionally. However, the risks for switch 4 and step in 2 turn out to be too risky to justify using them. The defender even finds themselves wanting to occasionally use a slow launching move sometimes to stop a step in, even though it’s risking eating a counter hit combo from the attacking options from switch stance. Even in this simple model, we get a game that’s already pretty complicated to reason about, so there’s a lot of room for room for players to explore.
Overall, to an outside observer, the majority result is the defender still mostly just standing there and the attacker seemingly futilely smashing mid attacks into a standing guard. But at least the attacker has 2 usable mids, switch 2 and now step in 1+2!. But I hope that it’s at least clear that there’s actually a lot of mind games going on underneath.
So how does this influence actual play? I think it mostly matches what I see in actual play, given the model I’ve laid here. Some things I can think of compared to my actual play experience:
- I probably use switch 1 and 3 much more often than only 5% each. But if I see that my opponent will launch punish and low parry combo these options consistently on each right guess (which I assume here), I probably would decrease their use to around the rates here.
- I probably use step in 3 and step in 4 even more than this. There’s benefits to the moves outside of just raw damage as presented here (such as frame advantage, a concept I’ll visit in the future).
- I use switch 4 over switch 2 quite often. This is due to its damage potential in particular situations (e.g. near a wall, I mention this in the next section) and people hardly do a full float combo in the level I play at. But if I imagine switch 2/4 being interchangeable mid options, doing a mid option out of switch 40% of the time makes sense.
- If I think that a defender is going to try to jab around 15% of the time, I feel like I would try to counter hit with switch 1 more than 5% of the time. Interestingly, none of the other attacker options that have non-zero probability beat a jab out-right. I guess the risk of getting a switch 1 launch punished is too high, and the mixup from step in with the 3 or 1+2 is good enough of an alternative.
Other things to look at later
This is just a quick look into a small part (the switch stance mixup game) into a single matchup (Josie vs. Josie) of a single fighting game (Tekken 7). Even for just this mixup game, there’s so many things that could change the payoffs for each attacker and defender option and change the results of the Nash equilibrium.
- Use of additional options: fuzzy guards/delays/sidesteps/etc. There’s actually much more options that the attacker and defender both have that I just left off for simplicity. There are ways for the defender to nullify some of the mixup. For example, by ducking fast enough to evade switch 1 and still recover to be able to jab to interrupt switch 2,3, and 4. This kind of defensive play is called a “fuzzy guard” or “option select”. But then the attacker can start delaying the switch 1 attack to catch that defender’s option. The defender can also simply side step to evade some of the attacks completely. Incorporating all of these options would make the tables really big, and I’m sure that I would be missing some routes even if I tried to enumerate them all. If you’re interested in those options, then I encourage you to just play around with the Nash equilibrium solver yourself.
- The stage being played on and location of the players. Stages with walls, balconies, and floors can easily increase the damage output of certain moves. For example, switch 4 can bounce the defender off a wall behind them, massively increasing the potential payoff of hitting the move. This could possibly make switch 4 a better option than switch 2 as the mid option of choice from switch. Realizing situations where different options get better is part of the fun of fighting games!
- The character the defender is playing. Josie is only one of a handful of characters that can block punish step in 3 for a full combo and has above average block punishment damage in general. So using Josie as the reference for the defender makes some of the attacker’s options less appealing (which is why I find the Josie vs. Josie match pretty obnoxious, apart from the opponent just not falling for Josie’s tricks). If the defender has worse payoffs for blocking certain offensive moves, the attacker could possibly increase their use of those moves.
- The knowledge, skill, and preparation of the opposing player. If the defender is unfamiliar with the matchup or does not consistently take full advantage of the attacker’s vulnerabilities, then risky moves with large payoffs for the attacker such as switch 1, switch 4, and step in 2 could be used more by the attacker.
- People are bad at randomization. Even if both players are trying to play the Nash equilibrium strategies (which is already unlikely), people are just bad at being random and inevitably would show patterns that the opponent can take advantage of. Recognizing opponent’s patterns or even conditioning your opponent to behave a certain way is a skill amongst top players in fighting games. You’ll notice in competitive play that after a while, better players seemingly start knowing exactly what their opponent is going to do and just win easily from there. As fighting game pro Lee “Infiltration” Seon-woo describes it, “Download Complete”.
And there’s so many different sub-games and situations to explore for each character matchup! There’s so much room for experiencing new things in fighting games, which is lot of the fun in learning to play fighting games. I hope that this makes fighting games seem at least a little more interesting to pick up. If you do try out fighting games, just don’t get caught up with trying to learn all the options at first and just have fun with mashing buttons into the opponents face.
However, this model has a disconnect with actual play. I’ve been trying to maximize our expected damage swing per mixup, and we’re getting numbers of ~1 to ~5 damage per mixup. This is below the damage of a single jab! This is fine if players had near infinite pools of health and the games were infinitely long and we were just playing a game of damage tug-of-war. Then we can justify this approach over the long term. But in Tekken 7, combos do greater than 70 damage (or even your full health pool depending on the situation!) and health pools are only 170 health in total. It’s possible that we only play a few instances of the mixup game, so the variance in payoffs matters quite a bit. Also once we get to lower health values, a 10 damage option might be just as good as a 70 damage option in terms of winning the game, but the 70 damage option would typically carry more risk.
In my next post, I’ll be tweaking the modeling to take into account repeated mixup games and how strategies change when health pools start decreasing. To do this, I’ll also introduce the concept of “frame advantage” and what “taking turns” in fighting games looks like. It’s an additional layer of depth found in the fundamentals of most fighting games and also an additional layer of looking at turn-based games in game theory and algorithms in programming. If you had any fun looking at fighting games through this lens of mixed Nash equilibrium, I’m sure that that follow-up will be fun for you as well!
Links:
Part 2 - Frame advantage and taking turns
Appendix A: Solving mixed Nash equilibrium by hand
In the first game, if we remove the 2 options that are probably going to be worse than the others, we’re left with a 3 x 3 game. We’re trying to figure out how to assign probabilities to the attacker and defender options to get to a Nash equilibrium.
| Defender strategy probabilities | |||||
|---|---|---|---|---|---|
| Attacker strategy probabilities | Stand | Duck | Jab | Slow move | |
| Switch 1 | 0 | 0 | 70 | 70 | |
| Switch 3 | 15 | -15 | -5 | 70 | |
| Switch 4 | 0 | 20 | -5 | 20 |
For a Nash equilibrium, these probabilities must be chosen such that, given one player’s strategy:
- the expected payoffs for the other player’s options that have non-zero probabilities in the other player’s strategy must all equal.
- the expected payoffs for the other player’s options that have zero probabilities in the other player’s strategy must be “worse” than the expected payoffs for the options that do have non-zero probabilities.
A complication in figuring out Nash equilibrium is trying to figure out which options should end up getting non-zero probabilities in the first place. The name for this set of options is called the “support”.
For this particular 3x3 game, let’s just assume that all options are in the support. Let’s just look at the attacker’s probabilities at first. They need to be chosen such that the defender is indifferent amongst all the options. We get this set of equations:
We can just solve this with some linear algebra with 2 of the equations:
Plugging that into your favorite linear system of equations solver gets you , , and thus , which is exactly what we got from the Nash equilibrium solver. We can do a similar exercise to get the probabilities for the defender’s options.
This worked out because this game was a square matrix and we’ve taken out strategies that would get dominated by other strategies so that all options would end up bein the support. When you have a more complicated game matrix (like I have in later parts of the post), one ends up having to try many different square sub-games to see what the support should be. That’s obviously a lot of work, so I’m really glad that D. Avis, et al. wrote up a Nash equilibrium solver because that saved me a lot of time. I ended up learning so much about Nash equilibrium that I didn’t know about before by having this tool to explore what the results would be if I changed values around.
Footnotes/References:
-
Except for the notable exception of the Super Smash Bros. series (e.g. “Super Smash Bros. Melee” and “Super Smash Bros. Ultimate”). Here the goal of the game is to knock your opponent off the stage, and damage makes characters fly further. The Super Smash Bros. series actually functions quite differently compared to other fighting games. Even though it shows up in big fighting game tournaments, people still debate on whether the Super Smash Bros. series is a fighting game or just in a genre of its own. ↩
-
In general, I’m using Josie simple bread and butter combos in open ground with no stage interactables and no rage. Generally speaking, this is a lower bound on damage output especially for launching combos. ↩
-
Randomizing evenly is already pretty hard on its own right, as evidenced from people organizing rock, paper, scissors tournaments. https://www.wrpsa.com/rock-paper-scissors-world-championship/ ↩
-
As far as I can tell though, the convergence of players towards Nash equilibrium is unknown. So it’s possible that players don’t really tend towards Nash equilibrium in the wild through adapting to each other’s play style. But I still think that finding the stable Nash equilibrium gives us insight on what a good strategy could look like. ↩
-
D. Avis, G. Rosenberg, R. Savani , and B. von Stengel (2010), Enumeration of Nash Equilibria for Two-Player Games. Economic Theory 42, 9-37. Online solver available at http://banach.lse.ac.uk. ↩
-
Josie has 2 other options out of step in. Step in 1, 3 is a high, high string that’s generally only used for combos. Step in 4 is a quick mid, and is actually a common option you’ll see in competitive play as an additional check to see if the defender is ducking. I don’t include step in 4 for simplicity because it’s functionally similar to a switch 2 or 4 in the model I’m setting up. ↩